

Review: Horner Canvas Series PLC with Integrated HMI – Part 2: HMI and Remote Monitoring

Horner PLCs with integrated HMI have not been part of our product range for long, but they are already attracting well-deserved attention. We asked industrial automation expert Jaroslav Blažek (blaja.cz) to take a closer look at them — especially in terms of functionality, intuitive operation, and practical deployment options. Find out how these Horner devices performed and what he has to say about them in the following review:
Explore Horner PLCs with HMI and I/O
Review by Jaroslav Blažek:
A Horner PLC with HMI in a single device is therefore a 2-in-1 unit. However, considering everything this device offers, we could even describe it as 4-in-1. Let’s take a look at how its HMI section and web server work. This follows on from the first part, which focused on the PLC functions of the Canvas 4 device.
Here we can see the result we want to achieve: an introductory screen with two buttons leading to additional screens. The two logos are just examples — almost anything can be placed on the screen. Let’s take a look at how to do it.

In the User Interface branch, we create four screens. The Temp screen is used to temporarily store tags and graphics that are not currently needed. The names can be chosen freely, and the Start Screen setting is also straightforward. Everything is intuitive — if you have ever worked with an HMI before, you’ll have it done in no time.

Assigning a variable to an object works the same way — from the same list as in the PLC, so nothing has to be done again. Here, for example, the bit indicating the state of the F1 key is assigned to an indicator.

HMI also means graphics, and there is a large selection of clip art, images, and other elements available.

Here is an example of assigning an integer variable to an input field: using the Write command, we move the value from one variable to another.

This is roughly what it then looks like. A switch starts the counter, which counts the pulses of the system bit %S5, as described in the first part of the article.

There is a field on the screen for writing and reading a variable.

Any change to a variable or even to the counter value is handled using this system keypad — it is clear and has large keys.

WebMI web server demonstration
 We still have the web server demonstration left. This was not originally part of the assignment, but once I discovered how intuitive and simple it was, I had to show it.
The web server runs directly in the PLC, similar to other manufacturers. But unlike one major player in the PLC and automation market, this web server actually works properly. It displays the same screens you see on the HMI.
The WebMI website name can, of course, be customized, including the logo image.

Setup is simple: go to Web → Configuration. At the top, you set the website name and introductory image. Important: at the bottom, you define the location of the web files. It was set to a Micro SD card, which we do not have in the PLC, so we redirected it to the internal memory. For a real application, it would be better to use an SD card, but for testing this is enough.
Then, in the User Login submenu, we disable web login.

After that, all that remains is to set the destination where the web files should be copied. The username and password fields are greyed out because login has been disabled.

Within a moment, all necessary files are copied to the appropriate location.

Then simply enter the PLC’s IP address into a web browser and you immediately arrive at the home screen.

It works perfectly — and above all, very fast.

A value changed via the PLC screen is immediately reflected here as well, and vice versa.

Conclusion:
There would still be plenty more to test, but this is enough to get a clear idea of how it all works. With future PLC + HMI models, I will also focus on slightly different functions.
Author: Jaroslav Blažek
Explore Horner PLCs with HMI and I/O
More reviews on Horner PLCs with integrated HMI:
Recommended products16

HORNER XLE PLC HMI controller with 2.2″ monochrome screen, analog / digital inputs and outputs
498,52 EUR Incl. VAT

HORNER XL10 Prime PLC HMI controller with 10,4″ colour touchscreen, analog / digital inputs and outputs
2 637,80 EUR Incl. VAT

HORNER XL7 Prime PLC HMI controller with 7″ colour touchscreen, analog / digital inputs and outputs
1 747,24 EUR Incl. VAT

HORNER X5 Prime PLC HMI controller with 4,3″ colour touchscreen, analog / digital inputs and outputs
1 126,51 EUR Incl. VAT

HORNER XL15 Prime PLC HMI controller with 15″ colour touchscreen, analog / digital inputs and outputs
3 447,29 EUR Incl. VAT

HORNER XLW Prime PLC HMI controller with 7″ colour touchscreen, analog / digital inputs and outputs
1 545,17 EUR Incl. VAT

HORNER XL6 Prime PLC HMI controller with 5,7″ colour touchscreen, analog / digital inputs and outputs
1 375,77 EUR Incl. VAT

HORNER CANVAS 4 PLC HMI controller with 3.5″ colour touchscreen, analog / digital inputs and outputs
1 066,01 EUR Incl. VAT

HORNER CANVAS 5 PLC HMI controller with 4.3″ colour touchscreen, analog / digital inputs and outputs
1 161,60 EUR Incl. VAT
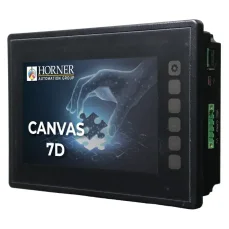
HORNER CANVAS 7D PLC HMI controller with 7″ colour touchscreen, analog / digital inputs and outputs
1 840,41 EUR Incl. VAT

HORNER CANVAS 10D PLC HMI controller with 10.1″ colour touchscreen, analog / digital inputs and outputs
1 978,35 EUR Incl. VAT

HORNER CANVAS 7 PLC HMI controller with 7″ colour touchscreen, analog / digital inputs and outputs
1 580,26 EUR Incl. VAT

HORNER XL4 Prime PLC HMI controller with 3,5″ colour touchscreen, analog / digital inputs and outputs
1 030,92 EUR Incl. VAT

CANopen – license for Horner PLC HMI controllers X4, X7 and X10
54,45 EUR Incl. VAT

SmartMod – remote Modbus RTU I/O modules for HORNER PLCs
234,74 EUR Incl. VAT

HORNER X2 PLC HMI controller with 2.2″ monochrome screen, analog / digital inputs and outputs
335,17 EUR Incl. VAT